Jira
We currently only support Jira Cloud.
Steps to Configure Jira
-
Go to the Jira Developer Console
- Visit Jira Developer Console.
-
Create a New Application
- Click on "Create" to create a new application.

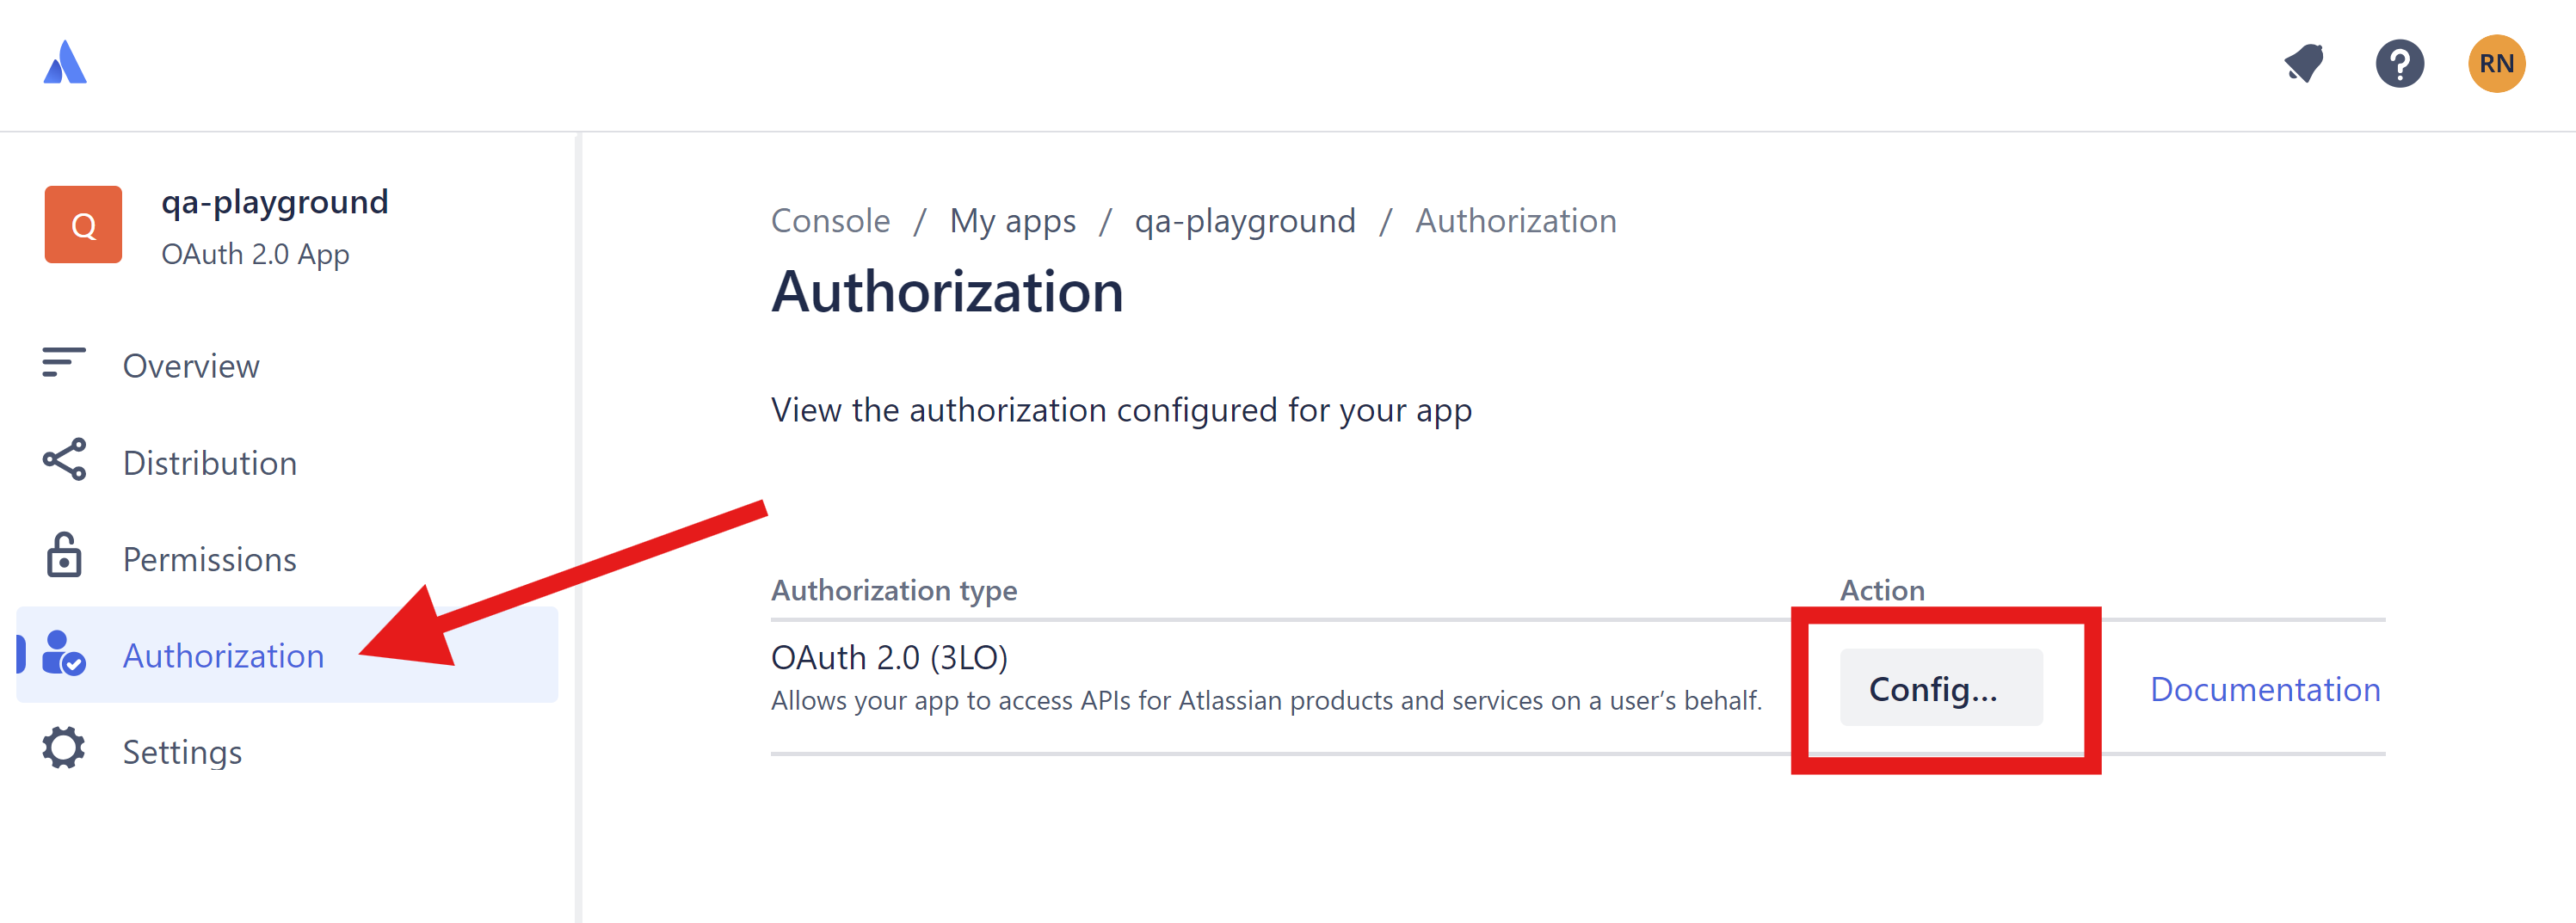
- Authorization Section
- After creating the application, click on it and navigate to the Authorization section.
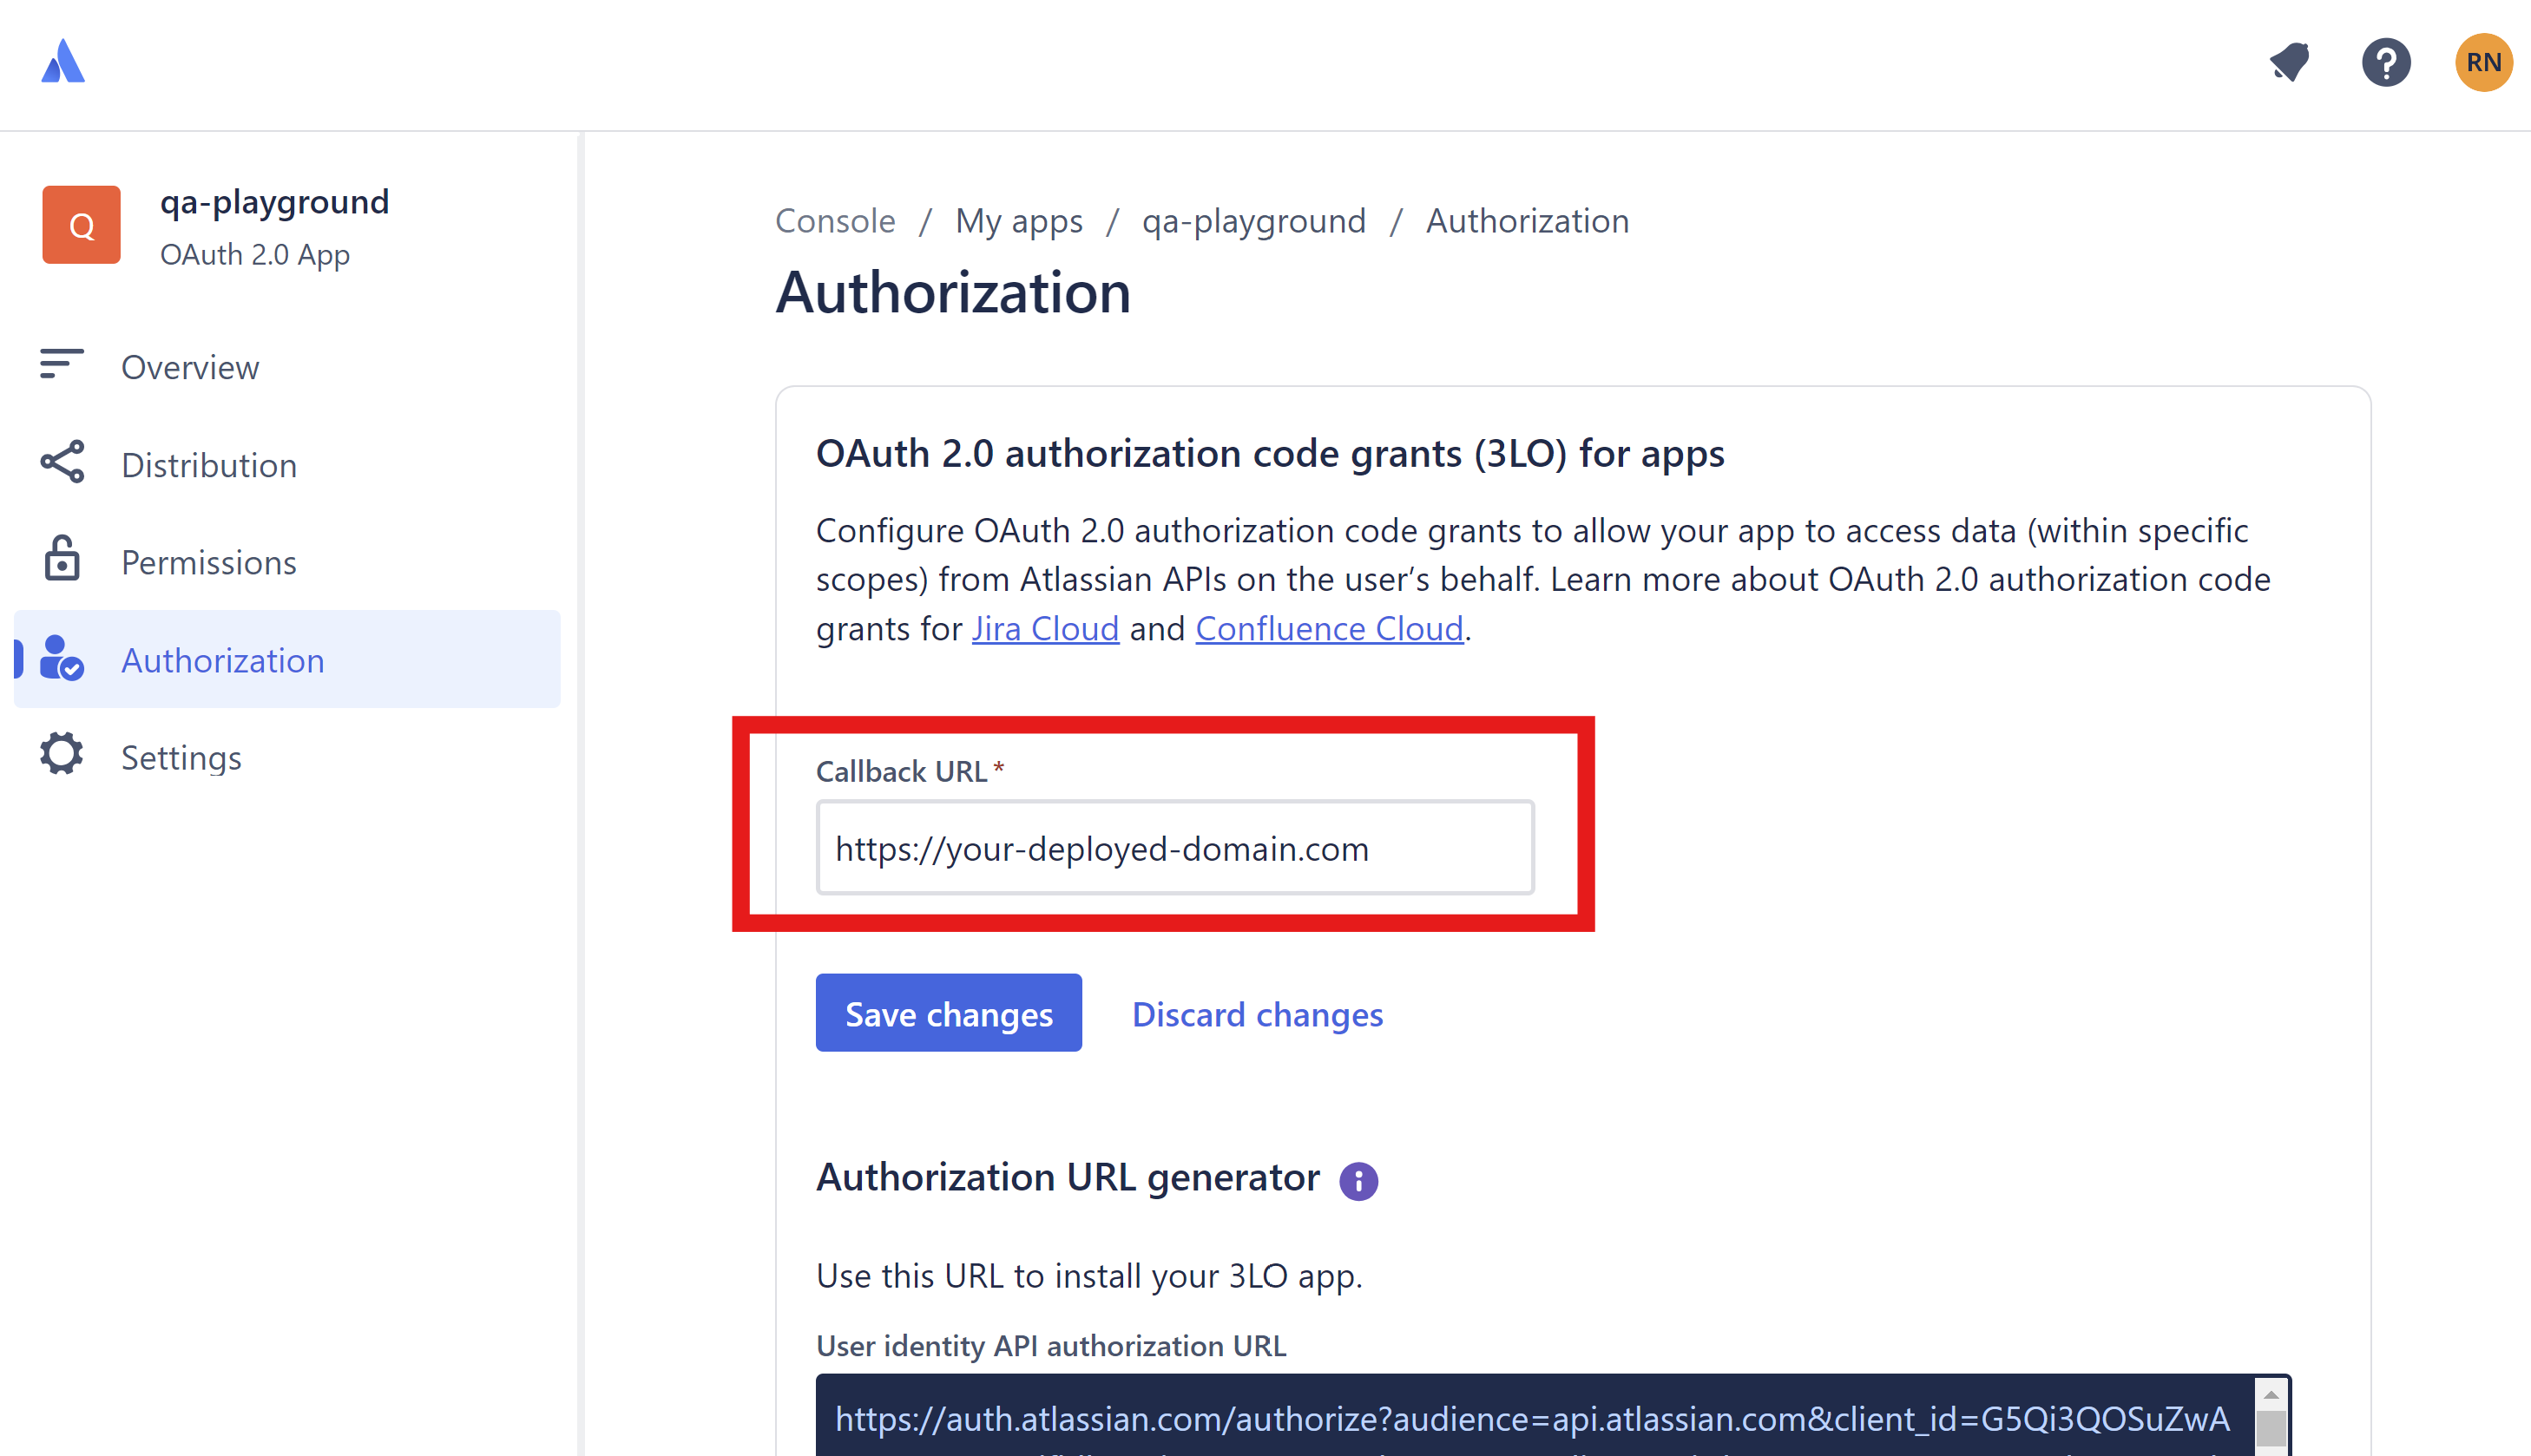
- Add or configure your OAuth 2.0 (3LO) with the callback URL:
<https://your-website.com>.
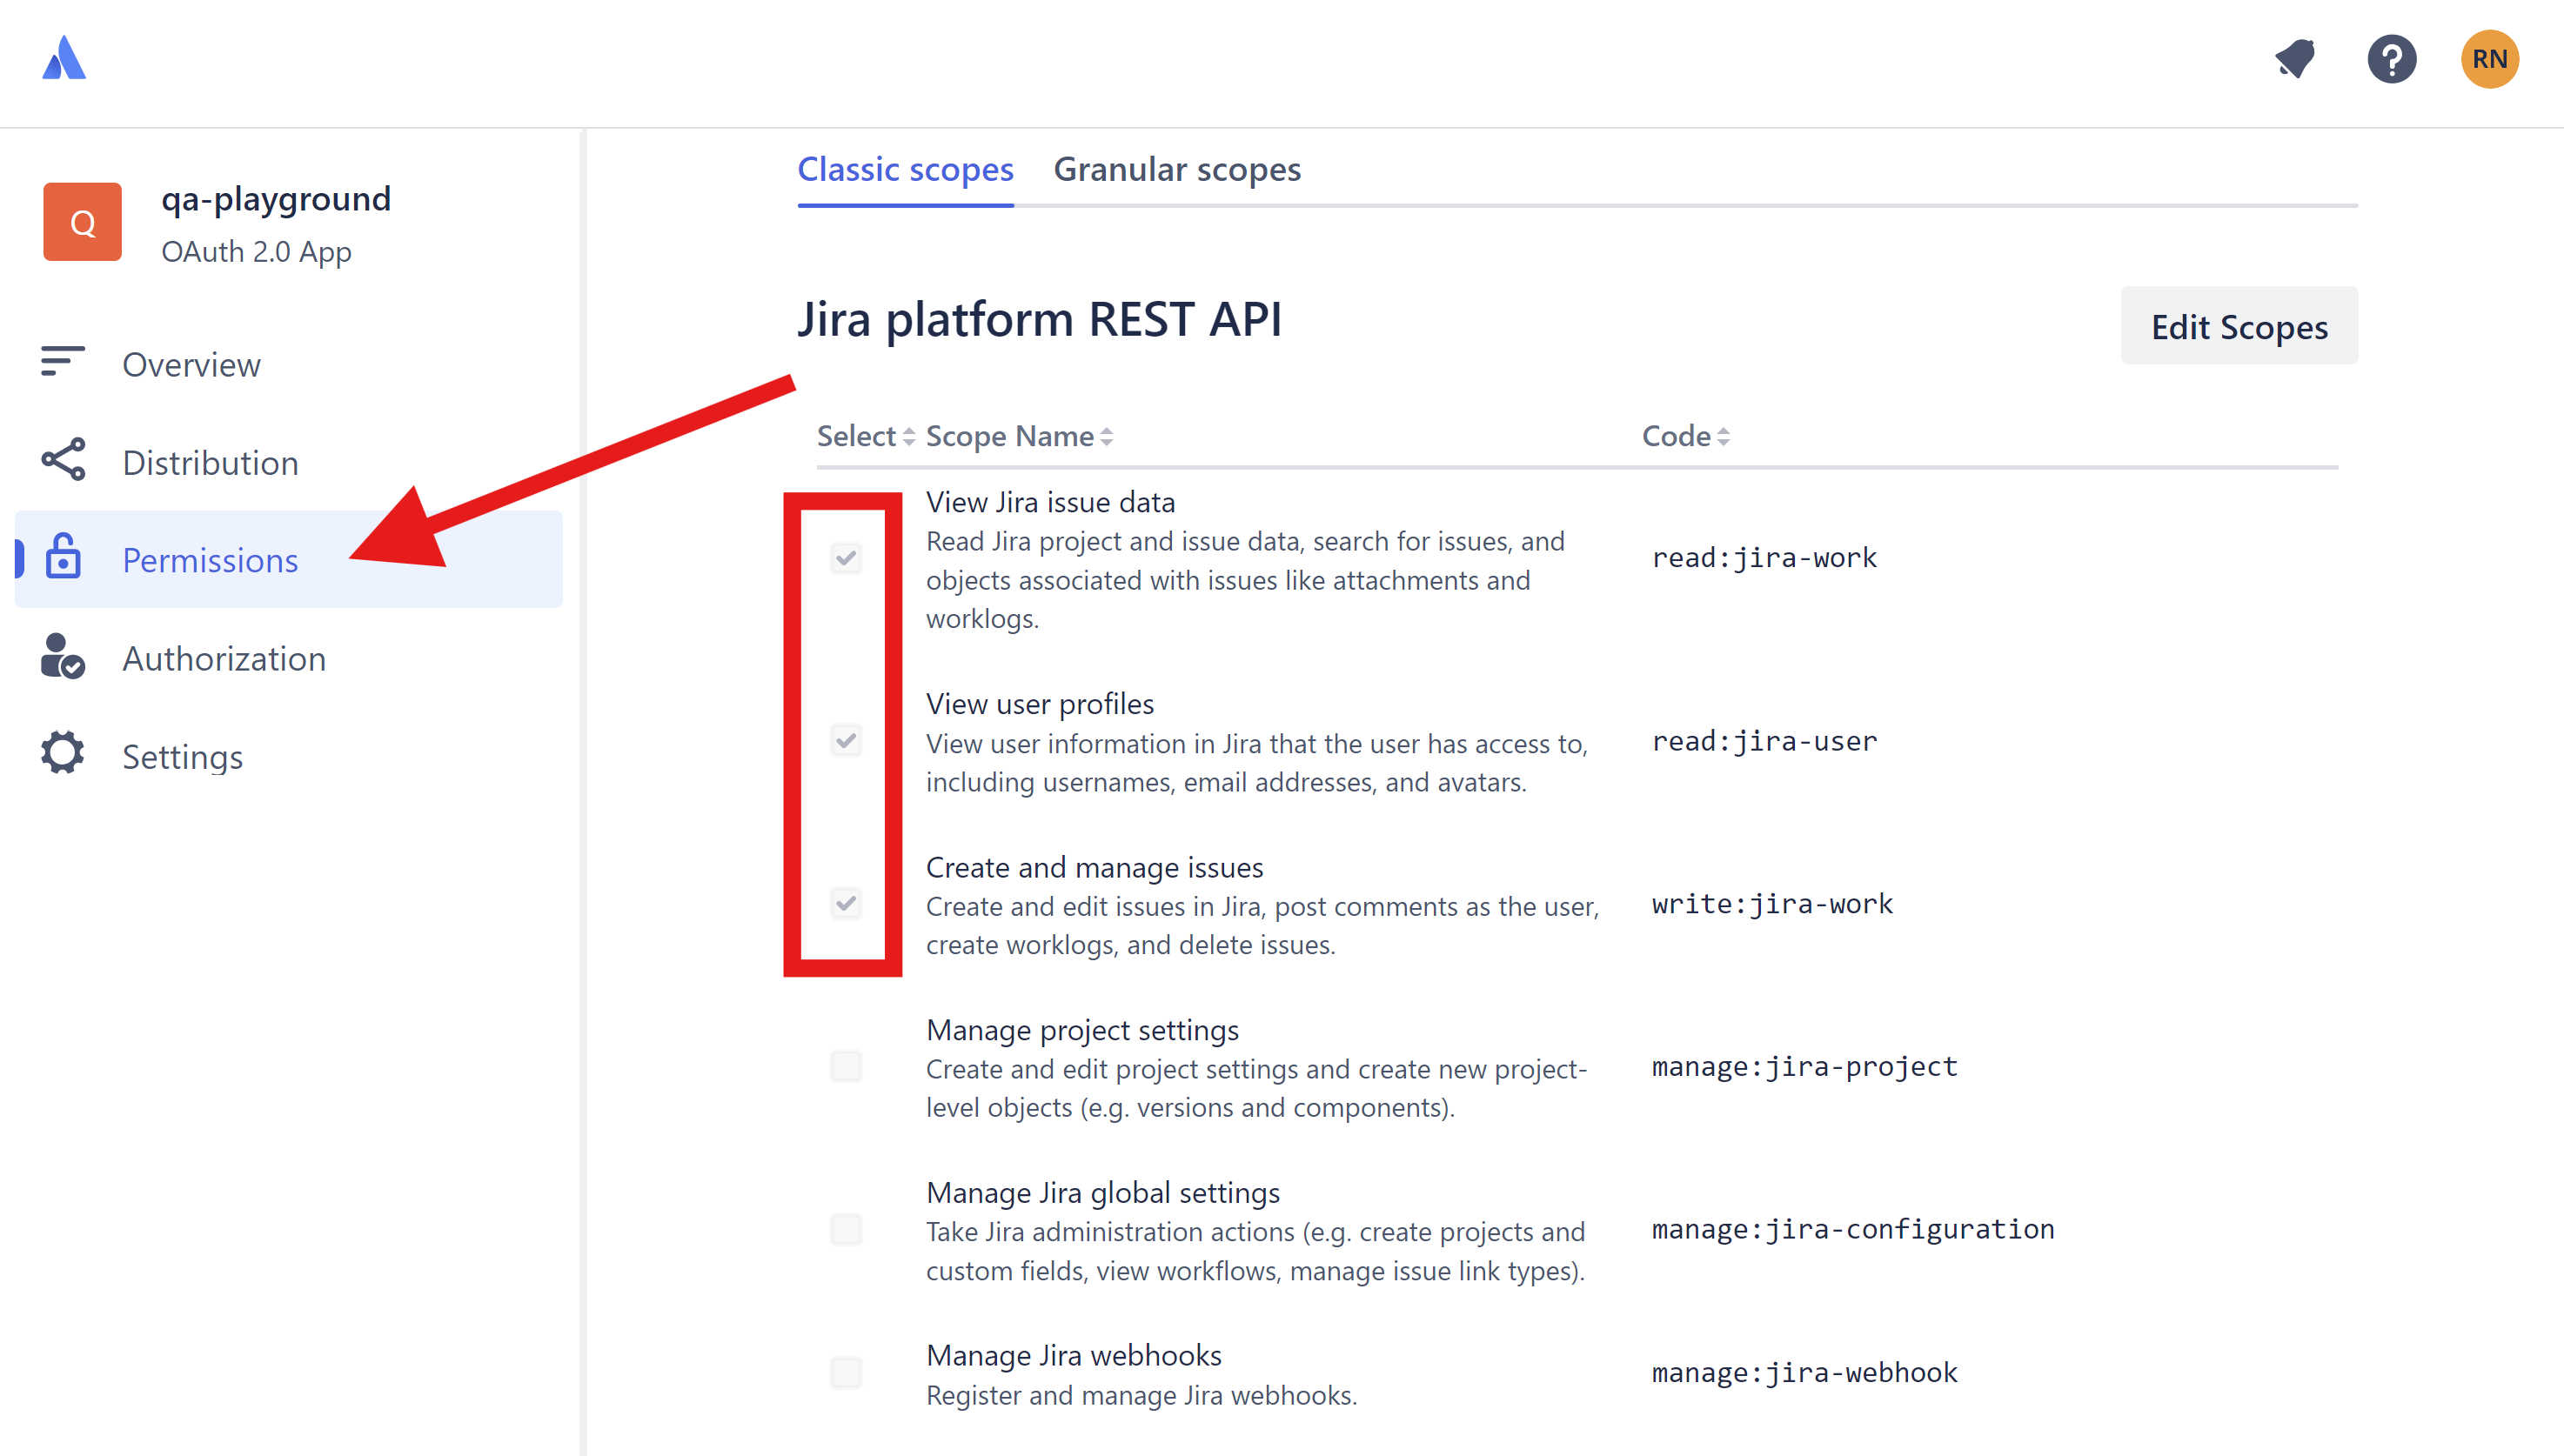
- Permissions Scope
- Go to the Permissions section.
- Under the Jira API, click Add/configure to add a new permission.
- Click Edit Scopes.
- Add the following permissions:
- View Jira issue data
read:jira-work - View user profiles
read:jira-user - Create and manage issues
write:jira-work
- View Jira issue data
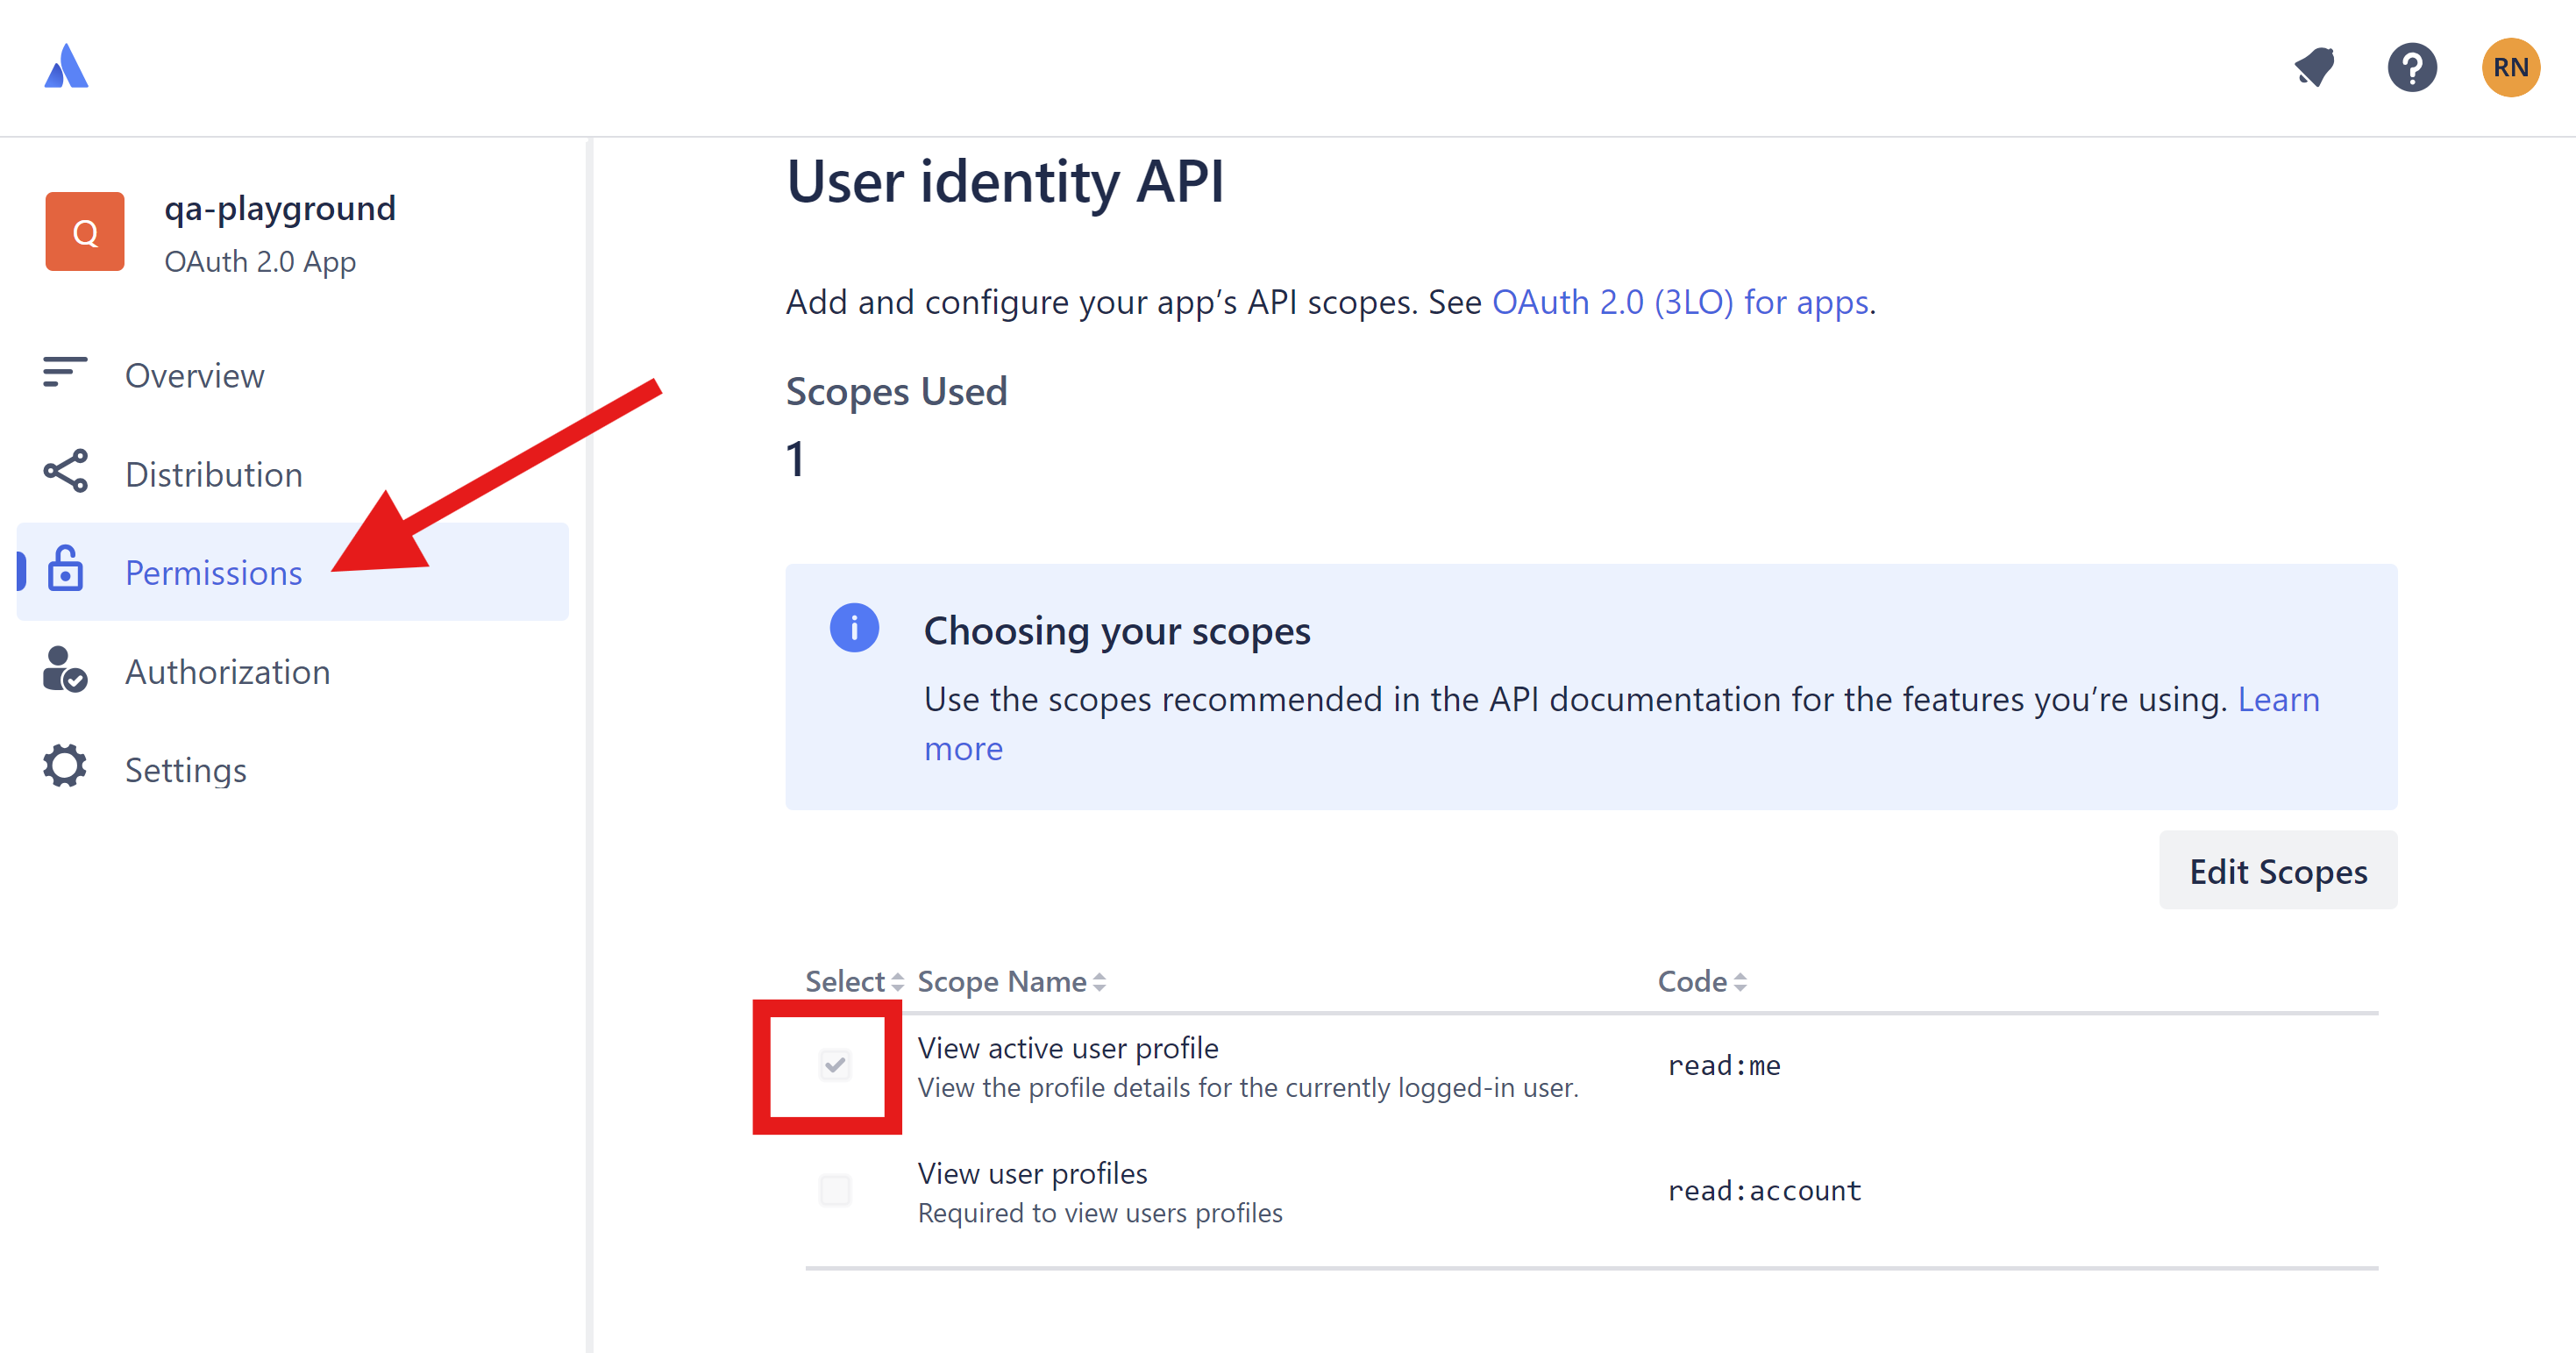
- User Identity API
- Under User Identity API add View active user profile
read:me.
- Under User Identity API add View active user profile
-
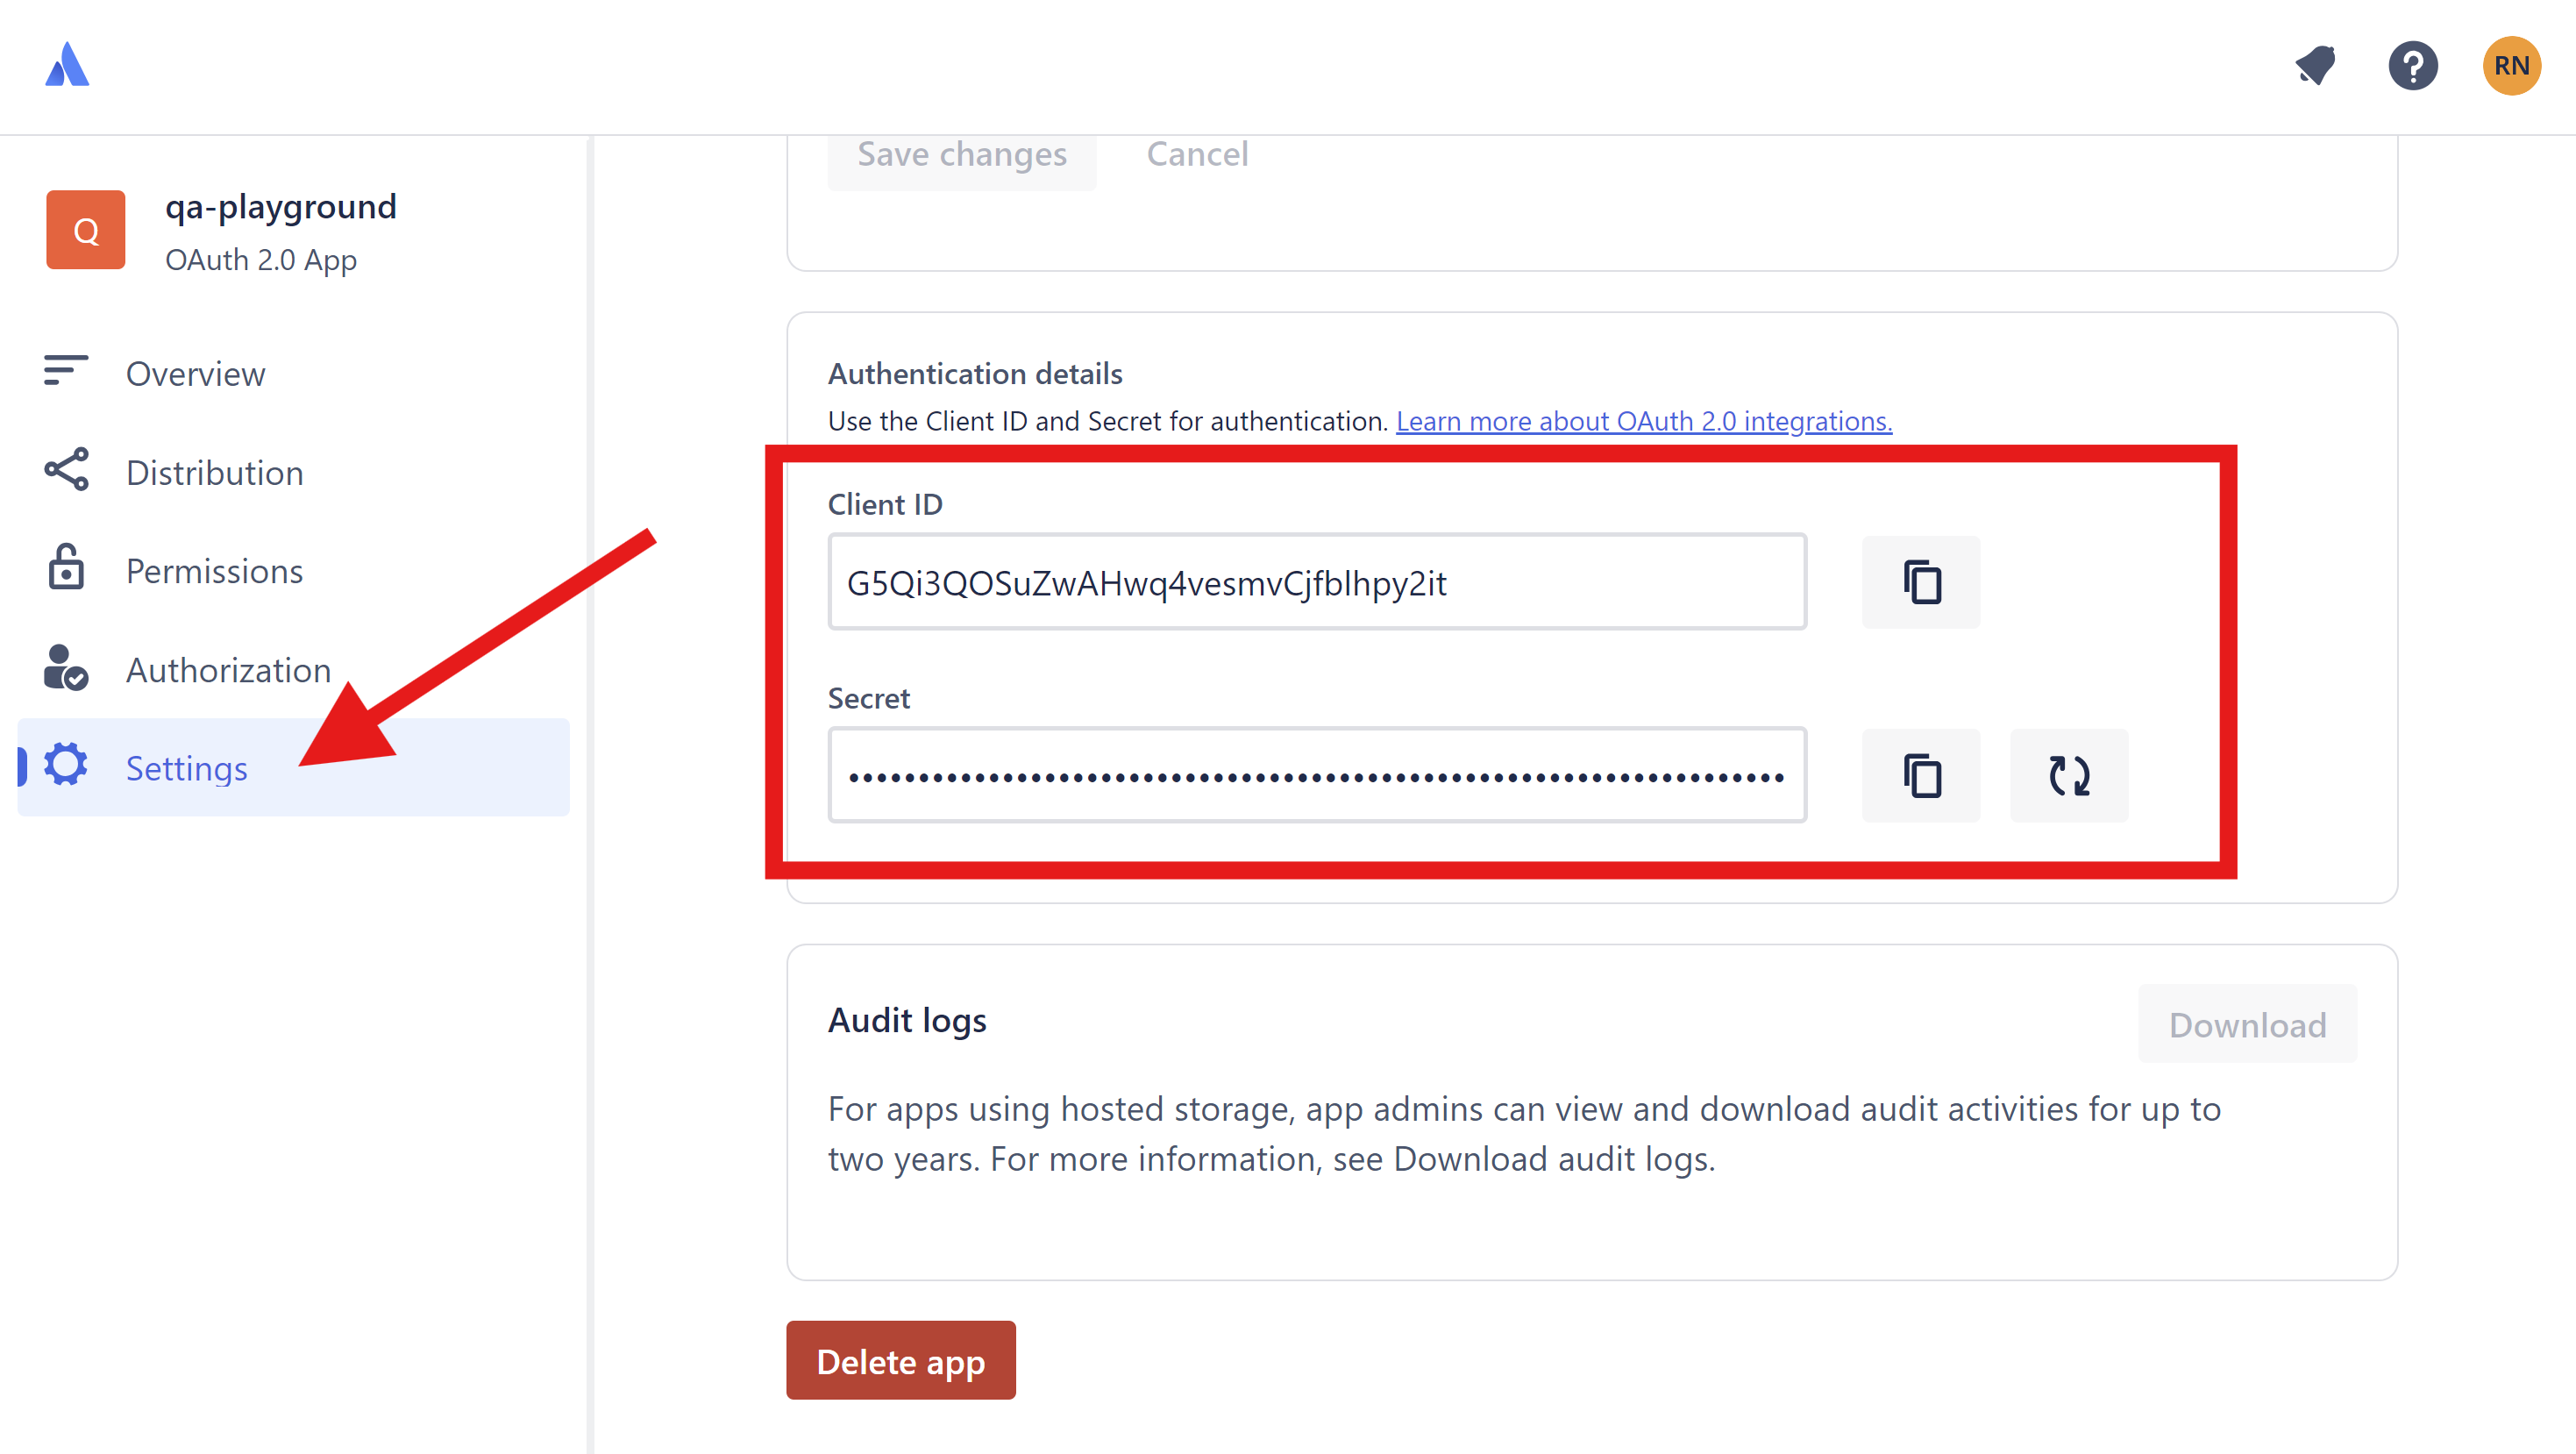
Settings Section
- Go to the Settings section.
- Copy the ClientID and Secret. You will need these in the next step.